Form fields
![]() Use the module Form fields to add personalized form fields to your website. You can add form fields to the checkout, to the contact form, to the signup form and create extra forms.
Use the module Form fields to add personalized form fields to your website. You can add form fields to the checkout, to the contact form, to the signup form and create extra forms.
For example:
- Add form fields to the checkout so your customers can choose a date and time for delivery
- Let your customers enter the name of a reseller
- Let your customers enter the name of the receiver of a personalized product
- Extra forms can be added to allow your customers to fill a price offer form
Adding form fields to your website
- Navigate to Settings > More options > Modules > Form fields.
If Form fields is not displayed in the menu, first adjust the user experience level to Expert, at Settings > More options > User experience level.
This module needs to be activated for the form fields to appear.

Tabs explained
- Checkout
- These form fields will be shown during checkout right below the shipping and payment selection.
It's recommended to not add too many fields in the checkout. Each extra field can be an obstruction preventing a smooth checkout. - Contact
- These form fields will be added to the built-in contact form.
- Create account
- These form fields will be added to the form for creating an account.
- Form 1-10
- These are custom forms that can be added on any page of the website. Use the keywords [WEBSHOP_FORM1] to [WEBSHOP_FORM10] in CMS to add the form to a page on your website.
Adding fields to forms
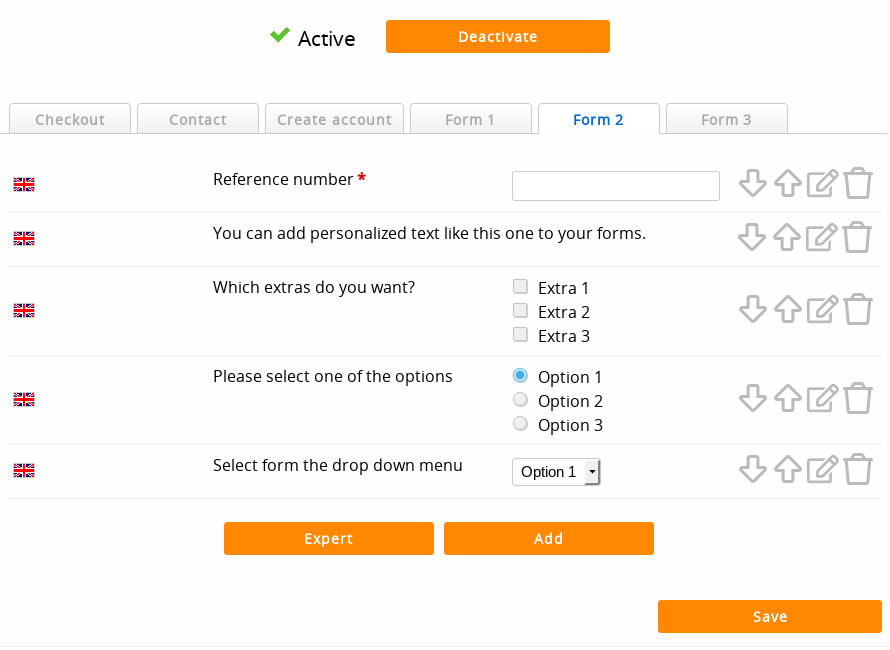
Select a form by using the tabs. Then click the Add button to add a new custom field in the form.
- Language
- Select the language in which the text for the form field will be. You need to repeat this for each language of your webshop. Form fields can be different per language, but it is advised to stay consistent in each language.
- Object
- Textbox - allows your customers to enter a text.
Checkbox - allows your customers to check an option. Multiple options can be checked.
Radio button - allows your customers to select an option. Only one option can be selected.
Drop down menu - essentially the same as a radio button, but a drop down menu consumes less space.
Description - a description field. This does not allow the customer to enter anything. It's used solely for providing information. - Name
- An optional name (or text) that should appear before the field. Choose a proper name so your customer understands what the field is for.
- Options
- For checkboxes, select buttons and drop down menu's, this field appears and allows you to add options to the object.
Use the Plus icon to add more options. - Default value
- An optional text that is pre-filled in the field. For checkboxes, select buttons and drop down menu's, this can be the default selected option.
- Required
- Check this box if the customer is required to enter a value or select an option.Be careful with this option. Making fields obligated makes it more difficult to complete the form. You may lose some customers if they find it too difficult to fill out the field.
- The form fields do not appear
- The form fields module needs to be activated for the form fields to appear.
- You need the Business version for this feature.
- Form fields need to be added separately for each language.
Next page: Digital or virtual products
Editing form fields
Click the Edit icon at the right side of the form fields table.
With the button Expert it is possible to copy a previous form field. Use an existing form field rule as an example and use the same format for adding new form fields. Using this expert feature, you can also copy form fields to other forms without having to use the interface each time.
Deleting form fields
Click the Delete icon at the right side of the form fields table and confirm you want to delete the option.
Be careful: it's not possible to restore or undelete a deleted form field. You have to add it again if you want it back.
Changing the order of the form fields
Click the down and up arrow icons at the right side of the form fields table to move a form field up or down.
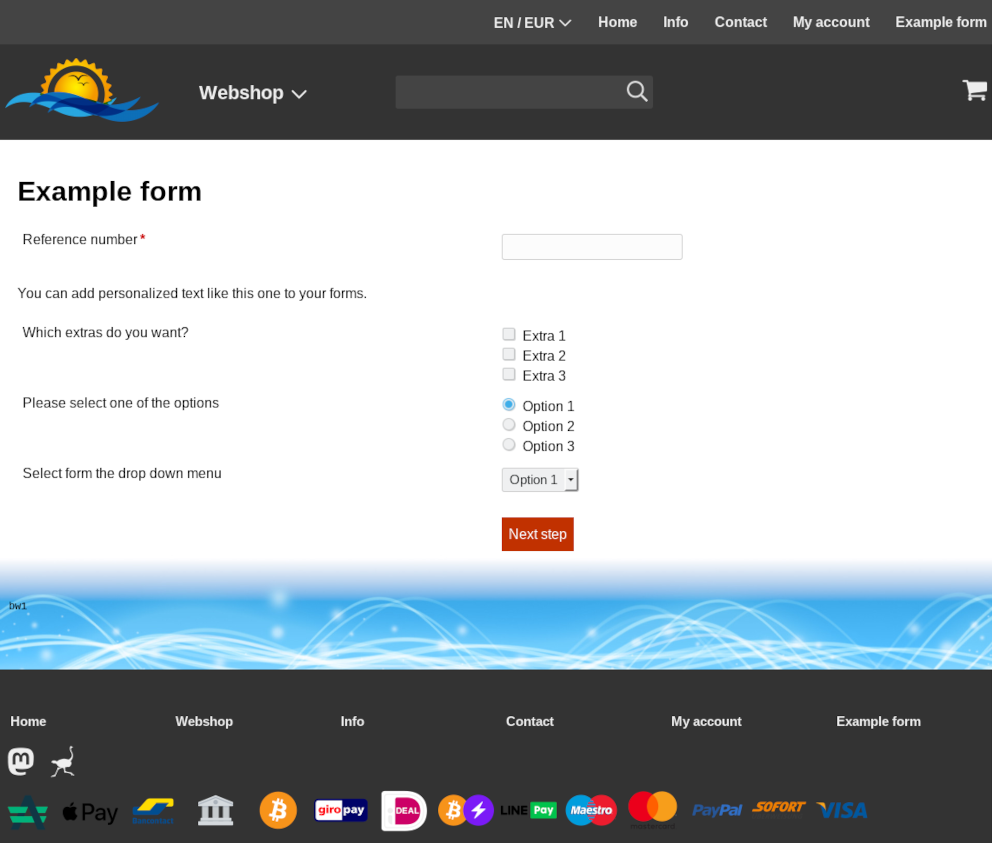
Example

After submitting a form, the result will be emailed to the email address set at account settings and also to administrators who have activated to receive contact or order emails.
All web forms on your website have built-in spam protection.
Frequently asked questions about form fields
- Introduction
- Product management
- Online store configuration
- Account and shop settings
- Payment methods and Payment Service Providers
- Invoices and Terms & Conditions
- Setting shipping costs
- Discounts and surcharges
- Registering and transferring domain names
- Multilingual shop
- Connecting to external platforms
- Personalized web addresses
- Managing multiple webshops (Multishop)
- Automatic emails to customers
- Designing a beautiful layout
- Order management
- Marketing
- Modules
- Backups and exporting data
- Email and web mail
- Administrator accounts
- High quality photos
- Two-factor authentication
- Labels
- META tags - Website verification
- Live chat
- Slideshow
- Visitor analysis - Google Analytics
- Filters
- Point Of Sale (POS)
- Form fields
- Digital or virtual products
- Symcalia reservation system
- Guestbook
- Contacting the helpdesk